1주차 할 일

이론 복습
클라이언트 : 요청을 하는 쪽(브라우저, 핸드폰)
서버 : 요청을 받는 쪽(API라는 창구를 통해서 클라이언트와 소통한다.)
(은행 창구처럼 정해진 규칙이 있다. -> 입출력을 하고 싶으면 입출력 창구를 가야 하고 주민등록증이 필요한 것을 의미)
그런 규칙들로 요청을 받으면 HTML, CSS, JS를 가져다가 돌려서 돌려주기도 하고 DB를 거쳐서 데이터를 돌려주기도 했다. / JSON 형태(딕셔너리+리스트 형태)로 값을 돌려준다.
서버는 특수한 컴퓨터가 아니다!
- 서버는 컴퓨터의 역할일 뿐이다. 사람도 투잡을 할 수 있는 것처럼 컴퓨터도 여러 역할을 맡을 수 있다.
DB도 돌리고, 서버도 돌리고, 게임도 하고!
- 서버는 요청을 받으면 HTML + CSS + JavaScript 파일을 주기도 하고, JSON 형식으로 데이터를 주기도 한다.
- JSON 형식으로 생긴 데이터 예시
API란?
- 서버가 요청을 받기 위해서 뚫어놓은 '창구'이다.
- 요청에는 POST(주로 데이터를 수정 할 때), GET(주로 데이터를 가져올 때) 등 여러가지 타입이 있다.
HTML, CSS, JS는 각각 어떤 역할을 할까?
- HTML은 뼈대 / CSS는 꾸미기 / JavaScript는 움직이게 하는 것
- CSS를 꾸밀 때는 이름표를 붙여주고(class="클래스명"), <style></style> 안에 .클래스명으로 사용한다.
JQuery는 어떤 친구였죠??
- JQuery는 JavaScript의 라이브러리로써, HTML 조작을 쉽게 하는 친구
- 라이브러리는 남이 만들어 놓은 갖다쓰기 좋은 코드! 그렇기에 임포트를 해야 한다.
- id로 이름표를 붙여주고(id="아이디"), $('#아이디').val()과 같이 input 박스의 값을 가져 올 수 있다.
Ajax는요?
- Ajax는 서버 통신을 위해 쓰이는 친구
이렇게 생겼습니다.
Flask는 어떤 역할을 하나요?
- 서버를 만드는 프레임워크이다. 서버를 처음부터 만드는 것은 너무 어렵기 때문에 누군가 만들어둔 틀 안에서 코딩 하는 것을 말한다.
폴더 세팅
나홀로 메모장 뜯어보기
1. templets, static 폴더를 만들고 app.py 파일을 만든다.
2. file -> settings -> Python Interpreter -> +버튼
3. 패키지를 설치한다.
: requests, bs4, flask, pymongo
4. index.html과 app.py 코드를 붙여 넣고 app.py를 run 시킨 뒤 localhost:5000을 접속한다.
패키지 import
# 크롤링 연결
import requests
from bs4 import BeautifulSoup

# Mongo DB 연결
from pymongo import MongoClient
client = MongoClient('localhost', 27017)
db = client.dbsparta
포스팅 API
## API 역할을 하는 부분
@app.route('/memo', methods=['POST'])
def saving():
    url_receive = request.form['url_give']
    comment_receive = request.form['comment_give']

    headers = {
        'User-Agent': 'Mozilla/5.0 (Windows NT 10.0; Win64; x64)AppleWebKit/537.36 (KHTML, like Gecko) Chrome/73.0.3683.86 Safari/537.36'}
    data = requests.get(url_receive, headers=headers)

    soup = BeautifulSoup(data.text, 'html.parser')

    title = soup.select_one('meta[property="og:title"]')['content']
    image = soup.select_one('meta[property="og:image"]')['content']
    desc = soup.select_one('meta[property="og:description"]')['content']

    doc = {
        'title':title,
        'image':image,
        'desc':desc,
        'url':url_receive,
        'comment':comment_receive
    }

    db.articles.insert_one(doc)

    return jsonify({'msg':'저장이 완료되었습니다!'})
function postArticle() {
let url = $('#post-url').val()
let comment = $('#post-comment').val()
$.ajax({
type: "POST",
url: "/memo",
data: {url_give:url, comment_give:comment},
success: function (response) { // 성공하면
alert(response["msg"]);
window.location.reload()
}
})
}<button type="button" class="btn btn-primary" onclick="postArticle()">기사저장</button>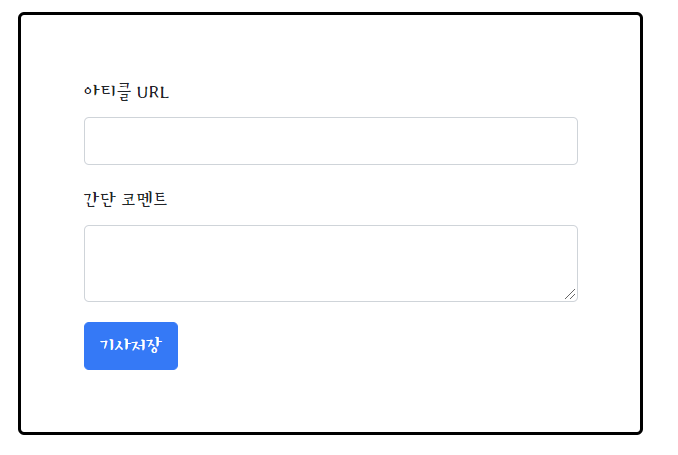
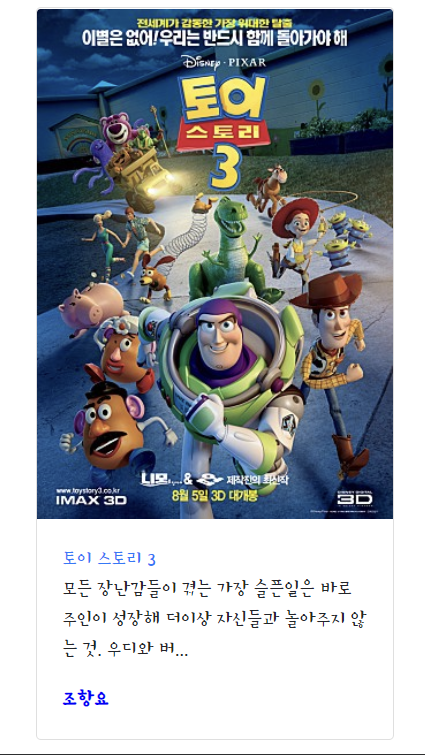
리스팅 API
@app.route('/memo', methods=['GET'])
def listing():
    articles = list(db.articles.find({}, {'_id': False}))
    return jsonify({'all_articles':articles})
let comment = articles[i]['comment']
let temp_html = `<div class="card">
<img class="card-img-top"
src="${image}"
alt="Card image cap">
<div class="card-body">
<a target="_blank" href="${url}" class="card-title">${title}</a>
<p class="card-text">${desc}</p>
<p class="card-text comment">${comment}</p>
</div>
</div>`
$('#cards-box').append(temp_html)
}
}
})
}
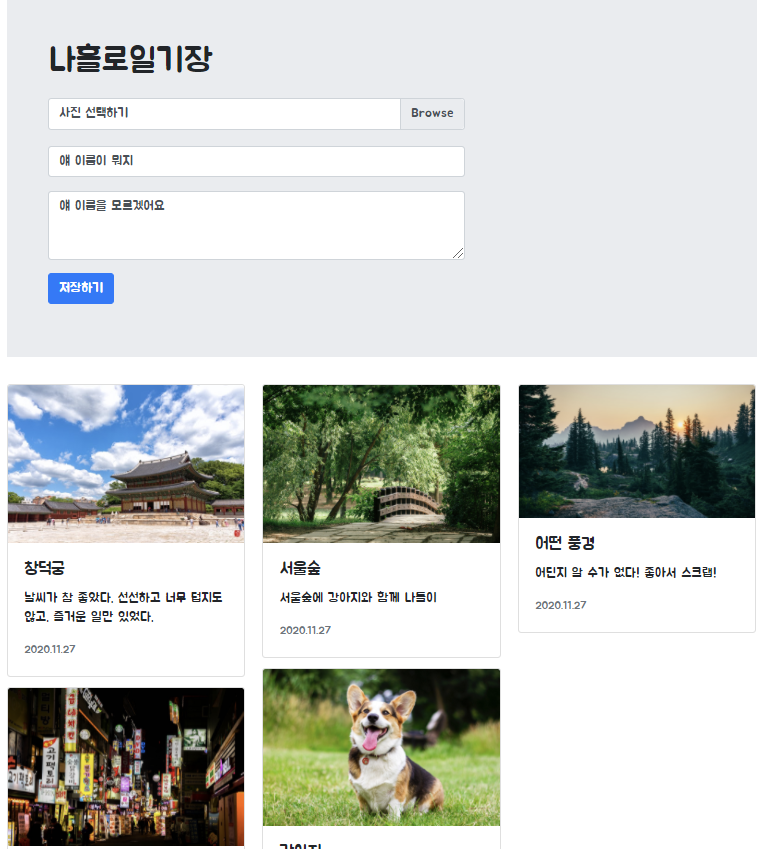
나홀로 일기장 준비하기
1. templets, static 폴더를 만들고 app.py 파일을 만든다.
2. 패키지 설치
: Flask, Pymongo
3. 만들어 갈 순서
1) 생김새를 먼저 만들기 - HTML, CSS, JS
2) 만들어야 할 기능을 파악하기(포스팅 API, 리스팅 API 두 개)
3) 서버 - 클라이언트 연결 코드 만들기
4) 포스팅 API 만들기 (보통 저장하는 것을 먼저 만들 때가 더 편해요)
5) 리스트 API 만들기
(Lv.1)
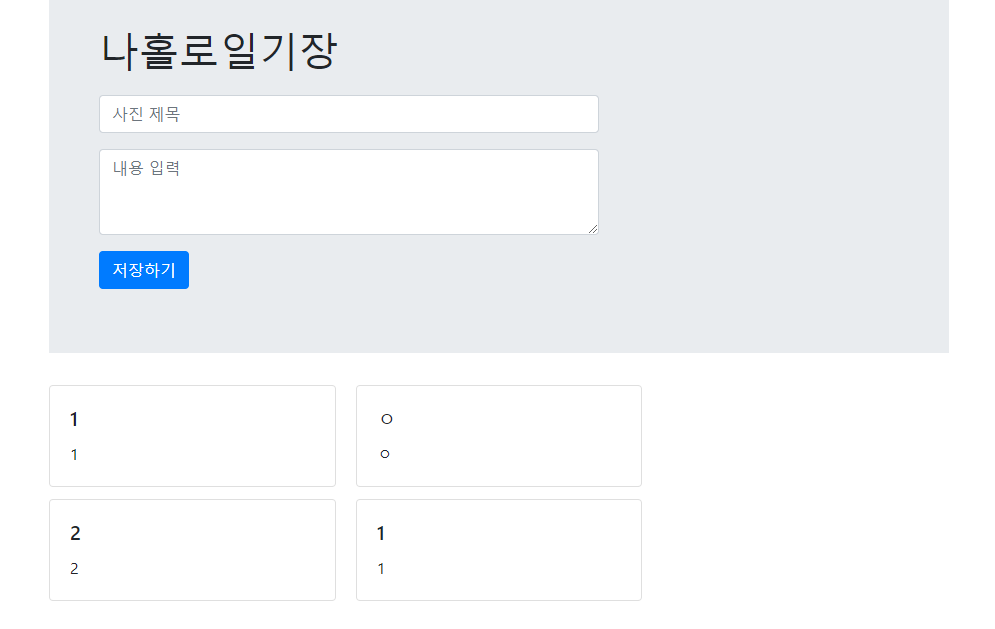
나홀로 일기장 만들기 (생김새)
1. 부트스트랩을 사용해서 틀을 만든다.
(부트스트랩 : 남이 만들어둔 CSS)
https://getbootstrap.com/docs/4.0/components/card/
Cards
Bootstrap’s cards provide a flexible and extensible content container with multiple variants and options.
getbootstrap.com
2. Google Fonts를 사용해서 폰트를 설정한다.
Google Fonts
Making the web more beautiful, fast, and open through great typography
fonts.google.com
완성 코드
<!doctype html>
<html lang="en">

<head>
    <!-- Required meta tags -->
    <meta charset="utf-8">
    <meta name="viewport" content="width=device-width, initial-scale=1, shrink-to-fit=no">

    <!-- Bootstrap CSS -->
    <link rel="stylesheet" href="https://maxcdn.bootstrapcdn.com/bootstrap/4.0.0/css/bootstrap.min.css"
          integrity="sha384-Gn5384xqQ1aoWXA+058RXPxPg6fy4IWvTNh0E263XmFcJlSAwiGgFAW/dAiS6JXm" crossorigin="anonymous">

    <!-- Optional JavaScript -->
    <!-- jQuery first, then Popper.js, then Bootstrap JS -->
    <script src="https://ajax.googleapis.com/ajax/libs/jquery/3.5.1/jquery.min.js"></script>
    <script src="https://cdnjs.cloudflare.com/ajax/libs/popper.js/1.12.9/umd/popper.min.js"
            integrity="sha384-ApNbgh9B+Y1QKtv3Rn7W3mgPxhU9K/ScQsAP7hUibX39j7fakFPskvXusvfa0b4Q"
            crossorigin="anonymous"></script>
    <script src="https://maxcdn.bootstrapcdn.com/bootstrap/4.0.0/js/bootstrap.min.js"
            integrity="sha384-JZR6Spejh4U02d8jOt6vLEHfe/JQGiRRSQQxSfFWpi1MquVdAyjUar5+76PVCmYl"
            crossorigin="anonymous"></script>

    <title>스파르타코딩클럽 | 나홀로일기장</title>

    <link rel="preconnect" href="https://fonts.gstatic.com">
    <link href="https://fonts.googleapis.com/css2?family=Jua&display=swap" rel="stylesheet">

    <style>
        * {
            font-family: 'Jua', sans-serif;
        }
        .posting-box {
            width: 500px;
            margin-top: 20px;
        }
        .wrap {
            width: 900px;
            margin: auto;
        }
        .container {
            padding-left: 50px;
        }
    </style>
</head>

<body>
<div class="wrap">
    <div class="jumbotron jumbotron-fluid">
    <div class="container">
        <h1>나홀로 일기장</h1>
        <div class="posting-box">
            <div class="form-group">
                <input type="email" class="form-control" id="exampleFormControlInput1" placeholder="사진 제목">
            </div>
            <div class="form-group">
                <textarea class="form-control" id="exampleFormControlTextarea1" rows="3" placeholder="내용 입력">
나홀로 일기장 만들기 (연결)
1. 기본 flask 코드를 app.py에 넣는다.
from flask import Flask, render_template, jsonify, request
app = Flask(__name__)

@app.route('/')
def home():
    return render_template('index.html')

if __name__ == '__main__':
    app.run('0.0.0.0', port=5000, debug=True)
2. API 연결 (저장하기-포스팅, 불러오기-리스팅)

나홀로 일기장 만들기 (API)
- 포스팅 API 만들기
1) 클라이언트와 서버 확인하기
-> 이미 위에서 완료함
2) 서버부터 만들기
-> Mongo DB 연결하기
# Mongo DB 연결
from pymongo import MongoClient
client = MongoClient('localhost', 27017)
db = client.dbsparta
# POST 요청 API 코드
@app.route('/diary', methods=['POST'])
def save_diary():
title_receive = request.form['title_give']
content_receive = request.form['content_give']
doc = {
'title' : title_receive,
'content' : content_receive
}
db.diary.insert_one(doc)
print(title_receive, content_receive)
return jsonify({'msg': '저장 완료!'})3) 클라이언트 만들기
// POST 요청 Ajax 코드
function posting(){
let title = $("#title").val()
let content = $("#content").val()
$.ajax({
type: "POST",
url: "/diary",
data: {title_give: title, content_give: content},
success: function (response) {
alert(response['msg'])
window.location.reload()
}
})
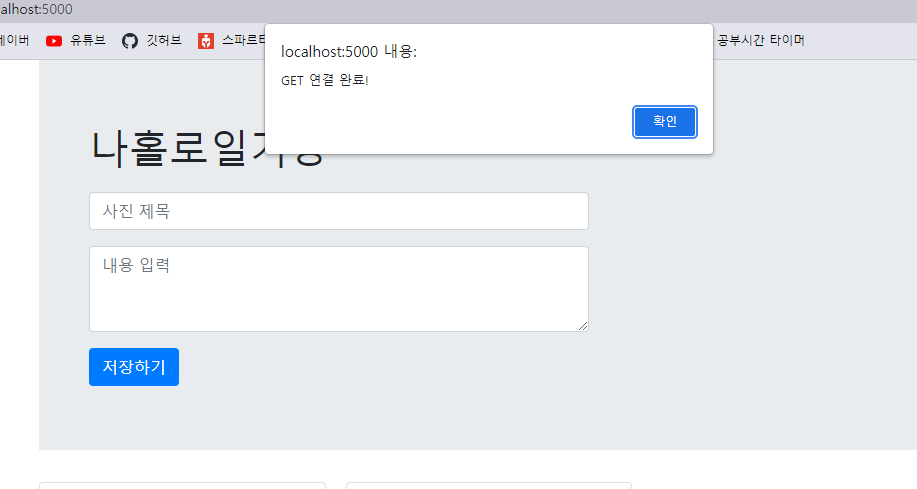
}4) 완성 확인하기

- 리스팅 API 만들기
1) 클라이언트와 서버 확인하기
-> 이미 위에서 했음
2) 서버부터 만들기
# GET 요청 API 코드
@app.route('/diary', methods=['GET'])
def show_diary():
    diaries = list(db.diary.find({}, {'_id': False}))
    return jsonify({'all_diary': diaries})
3) 클라이언트 만들기
        // GET 요청 Ajax 코드
        function listing() {
            $.ajax({
                type: "GET",
                url: "/diary",
                data: {},
                success: function (response) {
                    let diaries = response['all_diary']
                    for(let i = 0; i < diaries.length; i++) {
                        let title = diaries[i]['title']
                        let content = diaries[i]['content']

                        let temp_html = `<div class="card">
                                             <div class="card-body">
                                                <h5 class="card-title">${title}</h5>
                                                <p class="card-text">${content}</p>
                                            </div>
                                        </div>`

                        $('#cards-box').append(temp_html)
                    }
                }
            })
        }
4) 완성 확인하기
(Lv.2)
나홀로 일기장 만들기 (생김새)
1) 파일 업로드 만들어 보기
2) 파일 업로드 - 프론트엔드 만들기
- 카드에 이미지 넣기
- 폼 부분에 파일 업로드 넣기
- 파일 업로드에 파일이 들어가게 만들기
3) HTML, CSS - 카드에 이미지 넣기
- 부트스트랩 컴포넌트 페이지의 card에서 이미지 태그 찾아 넣기 -> static 폴더에 사진 넣고 가져오기
<div class="card">
    <img src="../static/monet.jpg" class="card-img-top">
    <div class="card-body">
        <h5 class="card-title">모네의 그림</h5>
        <p class="card-text">그림을 보면 마음이 안정된다.</p>
    </div>
</div>
4) HTML, CSS - 폼 부분 파일 업로드 넣기
<div class="custom-file">
  <input type="file" class="custom-file-input" id="customFile">
  <label class="custom-file-label" for="customFile">Choose file</label>
</div>
CSS 조정 해주기
: posting-box 클래스 안에 custom-file이라는 클래스를 지칭
.posting-box > .custom-file {
    margin-bottom: 20px;
}
5) HTML, CSS - 파일 업로드가 되게 만들기
: 선택한 파일이 보이지 않기 때문에 이것은 특별한 라이브러리를 임포트 해야 한다.
<script src="https://cdn.jsdelivr.net/npm/bs-custom-file-input/dist/bs-custom-file-input.js"></script>파일 업로드 코드는 자바스크립트 로딩 시 실행되는 함수에 넣는다.
bsCustomFileInput.init()
나홀로 일기장 만들기 (준비)
1. 파일 업로드
1) 서버 쪽에서 파일 받기 코드 먼저 작성
2) 클라이언트 쪽에서 파일 보내기 코드 작성
3) 잘 저장되나 확인
4) 파일 이름 변경하기 (날짜, 시간으로 - 겹치지 않게)
2. 서버 쪽 파일 받기, 클라이언트 보내기 - 한방에
1) 서버 쪽 받기 코드
file = request.files["file_give"]

save_to = 'static/mypicture.jpg'
file.save(save_to)
2) 클라언트 쪽 보내기 코드
function posting() {
    let title = $('#title').val()
    let content = $("#content").val()

    let file = $('#file')[0].files[0]
    let form_data = new FormData()

    form_data.append("file_give", file)
    form_data.append("title_give", title)
    form_data.append("content_give", content)

    $.ajax({
        type: "POST",
        url: "/diary",
        data: form_data,
        cache: false,
        contentType: false,
        processData: false,
        success: function (response) {
            alert(response["msg"])
            window.location.reload()
        }
    });
}
나홀로 일기장 만들기 (서버)
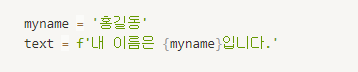
문법 연습
-> f-string
: 알고 있으면 엄청 예쁜 코드를 만들 수 있는 기능
-> datetime 함수
: 더 많은 문법을 원한다면 구글에 python datetime 사용법을 검색해라!
: 날짜 시간을 다루는 함수

1) 파일 이름을 변경 해주고 저장하기
: 파일 이름 변경 해주고 저장하기
(우리의 전략 : 겹치는 이름이 있으면 안되기 때문에 날짜-시간으로 해준다.)


이렇게 하면 파일 이름이 겹칠 일이 거의 없어진다.
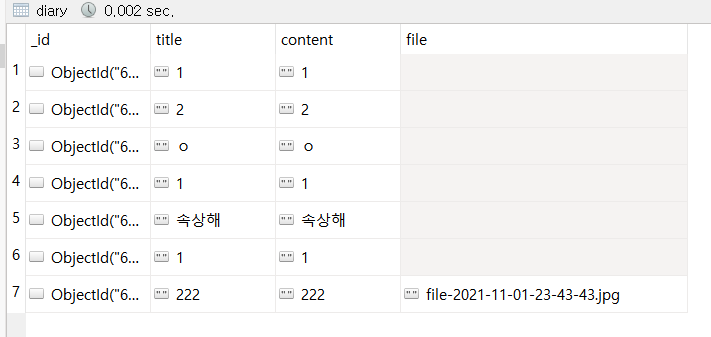
title과 content에 해당하는 file을 db에 넣어주면 된다.
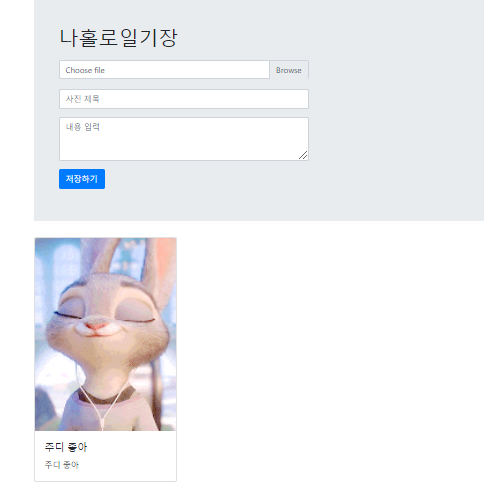
나홀로 일기장 만들기 (클라이언트)
1. 카드에 만들어 붙여보기
function listing() {
    $.ajax({
        type: "GET",
        url: "/listing",
        data: {},
        success: function (response) {
            if (response["result"] == "success") {
                let articles = response['articles']
                for (let i = 0; i < articles.length; i++) {
                    let title = articles[i]['title']
                    let content = articles[i]['content']
                    let file = articles[i]['file']

                    let temp_html = `<div class="card">
                                        <img src="../static/${file}" class="card-img-top">
                                        <div class="card-body">
                                            <h5 class="card-title">${title}</h5>
                                            <p class="card-text">${content}</p>
                                        </div>
                                    </div>`

                    $('#cards-box').append(temp_html)
                }
            }
        }
    });
}
2. 잘 작동하는 지 확인
AWS 관련 내용은 웹개발 플러스 PHP 파일을 보는 것을 추천함
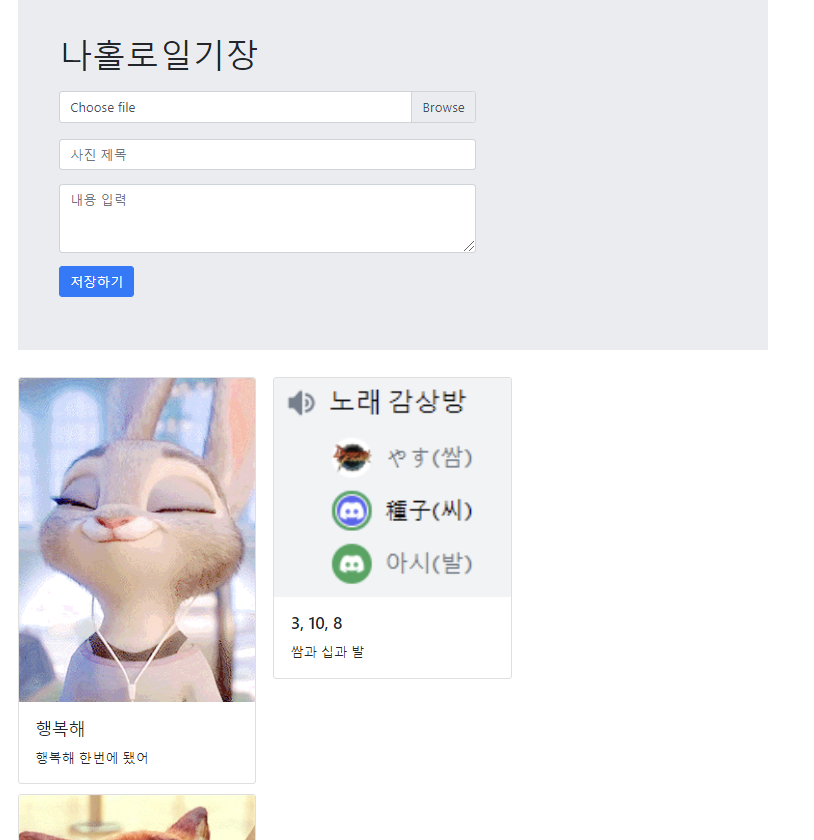
오늘은 강의 따라하면서 오류가 발생하지 않고 한번에 연결 했다!!! 너무 행복해 완전 행복해 미친다 진짜
'⛵ 항해 중 > 웹 개발 플러스' 카테고리의 다른 글
| 웹개발 플러스 4주차 강의 (0) | 2021.11.04 |
|---|---|
| 웹개발 플러스 3주차 강의 (0) | 2021.11.03 |
| 웹개발 플러스 2주차 강의 (0) | 2021.11.02 |


댓글